WordPress uses a MySQL database to store all its data, including posts, pages, users, and more. To create a database in WordPress, you’ll need to use a tool called phpMyAdmin, which is typically provided by your web hosting company.
Here are the general steps to create a database in WordPress:
Login Web Hosting
Log into your web hosting account and navigate to the database section.
phpMyAdmin
Look for a tool called “phpMyAdmin” and click on it.
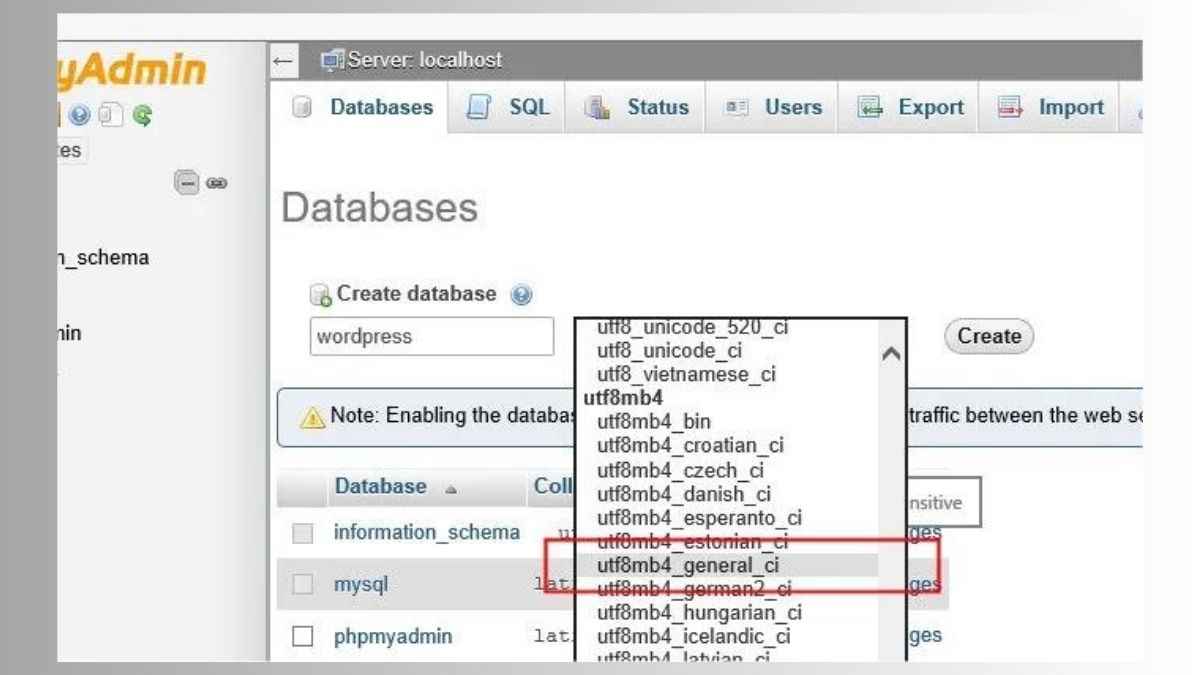
Databases
In phpMyAdmin, click/open on the “Databases” table.
Create DataBase
In the “Create database” field, enter a name for your database, and then select “utf8mb4_general_ci” as the collation.
Create
Click on the “Create” button to create your database.
phpMyAdmin Interface
Once the database is created, you will see it in the list of databases on the left side of the phpMyAdmin interface.
WordPress Application
Now you will need to create a user for your database, this is the user that the WordPress application will use to connect to the database.
Privileges And Add Users
On phpMyAdmin click the database you just created, and then click on the “Privileges” tab.
Click on “Add User”
localhost
Fill out the form with the desired user and password, also select the host as localhost, then click “Go”
Now User Created
Now you should have a new user created and associated with the database.
WordPress Installation
The database and user are now ready to be used with your WordPress installation. During the WordPress installation process, you will be prompted to enter the database name, username, and password that you just created.
Note: Make sure to keep the database name, username, and password safe, as you will need them when you install WordPress and when you need to troubleshoot any issues.