Installing a WordPress theme in cPanel is a simple process that can be completed in a few steps. This is an outline of the way to make it happen:
Login cPanel
Log in to your cPanel account: Go to your web host’s website and log in to your cPanel account.
File Manager
Access the File Manager: Once you’re logged in to cPanel, you should see an option for “File Manager.” Click on that to access the file manager.
WP Content
Locate the “wp-content” folder: In the file manager, you should see a folder called “public_html.” Open that folder, and then open the “wp-content” folder.
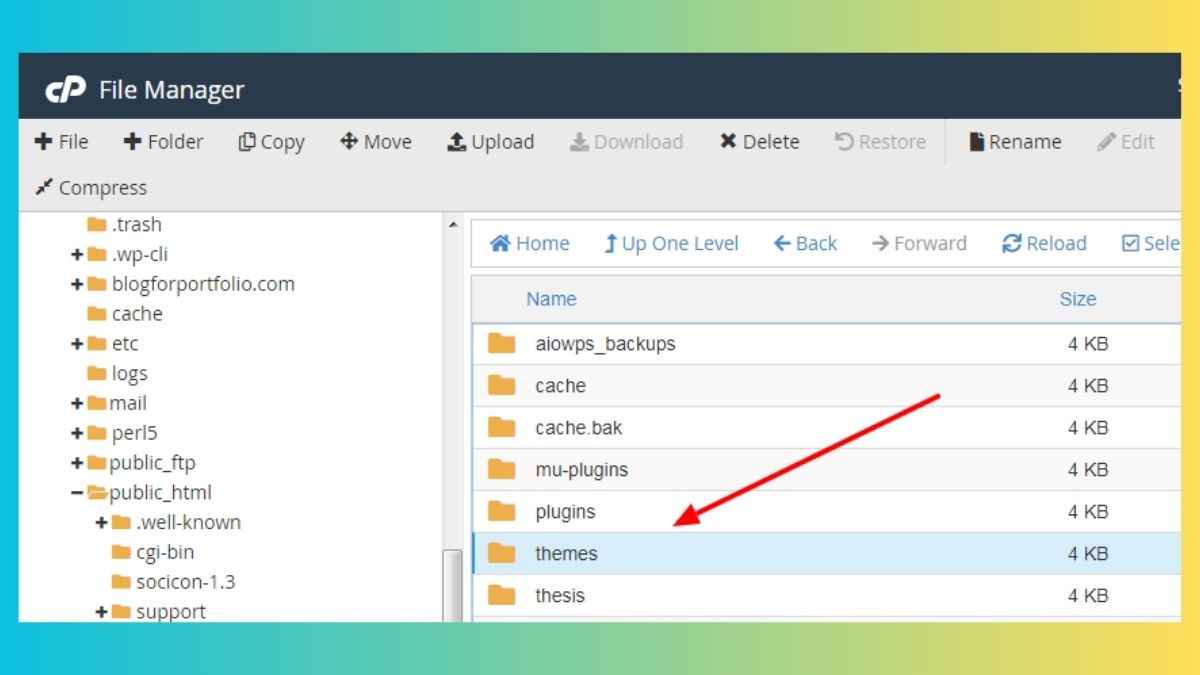
Themes Folder
Open the “themes” folder: Inside the “wp-content” folder, you should see a folder called “themes.” Open that folder.
Upload The Theme
Upload the theme: To upload a theme, click on the “Upload” button at the top of the page. You can then navigate to the location on your computer where you have the theme file saved, and select it to upload.
Related Topic: How to Create a WordPress Website
Related Topic: How to Create a Database in WordPress Website
Extract The Theme
Extract the theme: Once the theme is uploaded, you will need to extract the files from the archive (zip or tar.gz)
Activate The Theme
Activate the Theme: Once the theme is uploaded and extracted go to your WordPress dashboard, click on Appearance, and then Themes, the theme you uploaded should be there ready for you to activate it.
Note: Some hosts also have a one-click plugin that enables you to browse and install themes directly from your WordPress dashboard.
It’s also important to check that the theme you are installing is compatible with the version of WordPress you are running, most of the time this information is provided by the theme developer in the theme’s webpage or documentation.